My daughter's fascination with all things that squirm, wiggle, slime and crawl began in toddlerhood. I remember her at the age of two, sitting in a lotus pose in her carseat with a squirming ant pinched delicately between the thumb and forefinger of each hand. Whenever I'd hear, "Mommy, can you please hold these for a minute?" I'd first look for tiny legs wiggling out from between the cracks of her little fingers before I'd agree to hold whatever she was clutching.
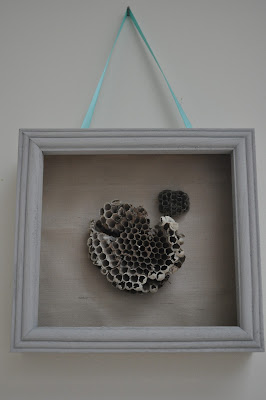
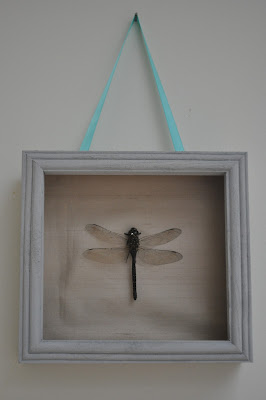
Recently, my husband found a beautifully intact (dead) dragonfly on the deck of the ferry he works on, and brought it home for Ariel. Later, she found a large moth that had died with its proboscis extended, which she spent hours examining with a magnifying glass. Eventually, an assortment of tiny wings--some bird, some insect--found their way into her collection, along with a piece of wasp hive and a pretty yellow moth.
Dead insect wall art may not be everyone's cup of tea. But Ariel wanted to hang hers on her bedroom wall, and we knew that storing them in paper cups and old light bulb boxes wasn't the most reliable way to keep them safe.
Here's what I did:
I bought three, inexpensive shadow boxes from a crafts store and punched out the plexiglass, then washed them with watered down Annie Sloan Chalk Paint in Paris Grey for a lovely, weathered wood effect. The frames are roughly (translate: cheaply) made, but I didn't bother sanding the wood because I liked the rustic look created by the raised grain.
The frames didn't have hangers on the back, so I used my small staple gun to attach a bit of ribbon for hanging. I didn't bother to paint the entire back of the frame; only the parts that show when you look at the shadow box from the front.
I used a lovely scrap of oatmeal coloured silk to cover the wooden frame backing. I simply cut a square piece one inch larger than the backing, and attached it with fabric glue-tape. Then I very carefully attached the dragonfly to the wooden backing with a straight pin. I did the same for all three frames, attaching the smaller insects and wings with a tiny dab of hot glue, using tweezers to arrange the most delicate specimens without damaging them.
I inserted the backings into the frame and voila! I like the look of them. They are little bits of Mother Nature's perfection, with Shabby Chic appeal. To me, the rough, muted grey wood looks sophisticated paired with the silk, and the ribbon gives a little pop of fun colour, like robin's eggs in a nest of twigs.
My only complaint: the slight rippling of the fabric, which appeared when I put the frames back together. Next time, I'll use more glue-tape to adhere the fabric firmly in place.
I think they'd look smashing in my dining room, but then again, not everyone likes to look at bugs while they eat. Perhaps I'd better stick to shells...
So, bugs on the wall: Ick or Art? I suppose, as with so many things, it's all in the eye of the beholder.


What a lovely way to honour your daughter's passion! Not only is it special to her, you have made something that is "icky" to some look really beautiful...great job, you are one crafty mama!
ReplyDeleteThanks so much, Sylvia! They were really fun to do.
ReplyDelete