
The Problem: A narrow upper bunk and no place to sit

Bing has a great layout, with a front bunk where our kids will sleep--Ariel on the top and Graham on the bottom--plus a side dinette that converts into a double bed. As you can see in this before shot, the upper bunk is very narrow, and is tucked right against the sloping wall and window, making it feel narrower still.
The upper bunk is removable, but there was nowhere to store it inside the camper. Since it's hardly practical to store the bunk outside all day long while camping, the lower bunk was pretty much unusable as a couch. That left only the dinette for seating, which is fine when the weather is great and we're mostly outdoors, but not so comfy when everybody wants to cozy up inside.
The Solution: Pull the bunk away from the wall, and add brackets to store it against the ceiling during the day

My clever husband, Doug, engineered the whole modification and had the project done within a couple of days, with very little cost. Here, he's installing the new supports for the bunk. As you can see, he's installing them out from the front wall about six inches. This will make the bunk seem wider, even though the actual sleeping surface is the same as before.
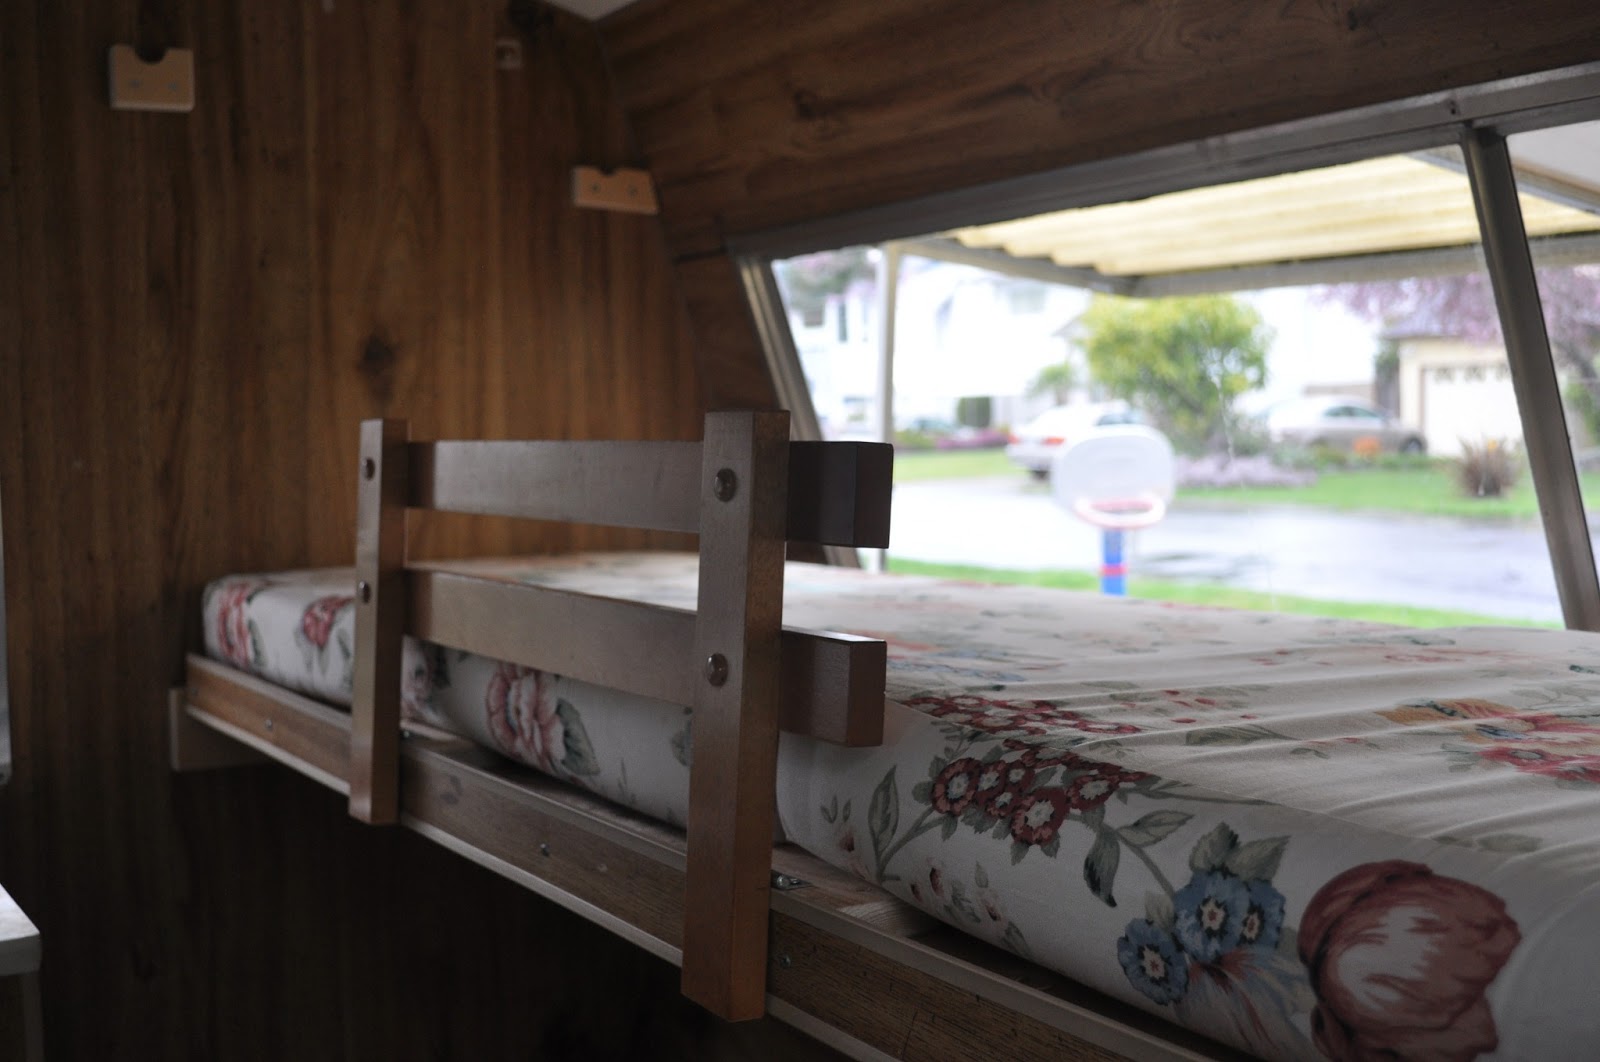
Above: Do you see the ledge that runs under the window? When Ariel is up in her bunk, she'll have a little "pocket" about four inches deep at her bedside to store books and toys in.
Below: As you can see, when we remove the upper bunk, Bing feels really spacious inside, and the lower bunk becomes a roomy "couch" big enough for the entire family plus our small dog, Higgins. The cushions from the upper bunk become the back couch cushions.


Here's the bunk installed on its new supports:

Top view of the upper bunk, out from the wall a few inches:

Installing the bunk out from the wall creates a nice storage ledge beneath the window for Ariel's toys and books:

The next step was to build new brackets to hold the upper bunk up against the ceiling. Doug left enough room to tuck pillows and bedding up there, too. Talk about handy!


And finally, to make Ariel feel safe and secure, we added a guardrail. The rail is part of the vintage bunk bed set they sleep on in the house (Doug and his brother used them as kids at the family cottage on nearby Salt Spring Island!). We took the bunk beds apart because the kids have their own rooms, so this guard rail was just stored in Graham's closet, unused.

Doug put the rail on hinges so that it folds flat for storage.

Voila! Two happy little campers.

If only I'd thought to snap a picture of the bed installed against the ceiling and the couch set up before we took everything out for painting! But you Glamper girls have vivid imaginations, so I know you can picture that one, last detail.
Next up: Bing gets whitewashed!!
Wow! Looks great! How did he brace it enough so the bunk bed didn't tear the wall off?
ReplyDeleteThanks so much!The bunk has two supportive poles that run the entire length of it. They extend beyond the bunk on either end and nestle into grooves in the supports, which are, in turn screwed right to the frame of the trailer. So the bunk is still supported in the same way as designed by the manufacturer, just moved slightly, if that makes sense. The bunk's actually really strong and can support an adult, too.
ReplyDeleteOh, k... I'm just surprised the frame can hold it! I'm just getting into fixing things up, so learning... Great job!
ReplyDelete